At some point, everyone who takes a photograph outside runs into the following dilemma. Overexpose the sky to have the ground correctly exposed or expose the sky correctly and underexpose the ground. You lose either way. And a lot of the solutions to this problem are pretty bad too. There’s graduated neutral density filters that can be expensive, cumbersome, and difficult to use with only decent results. Then there’s HDR which can leave your final image looking soft and fake after a sometimes long and complicated process. Don’t fret though.
There is a good solution.
Exposure blending is taking the same photo more than once with different exposures and blending those photos together in a software like photoshop to get the best parts of each image. No more choosing between overexposed sky or underexposed ground. You can have both and still have a high-quality image.
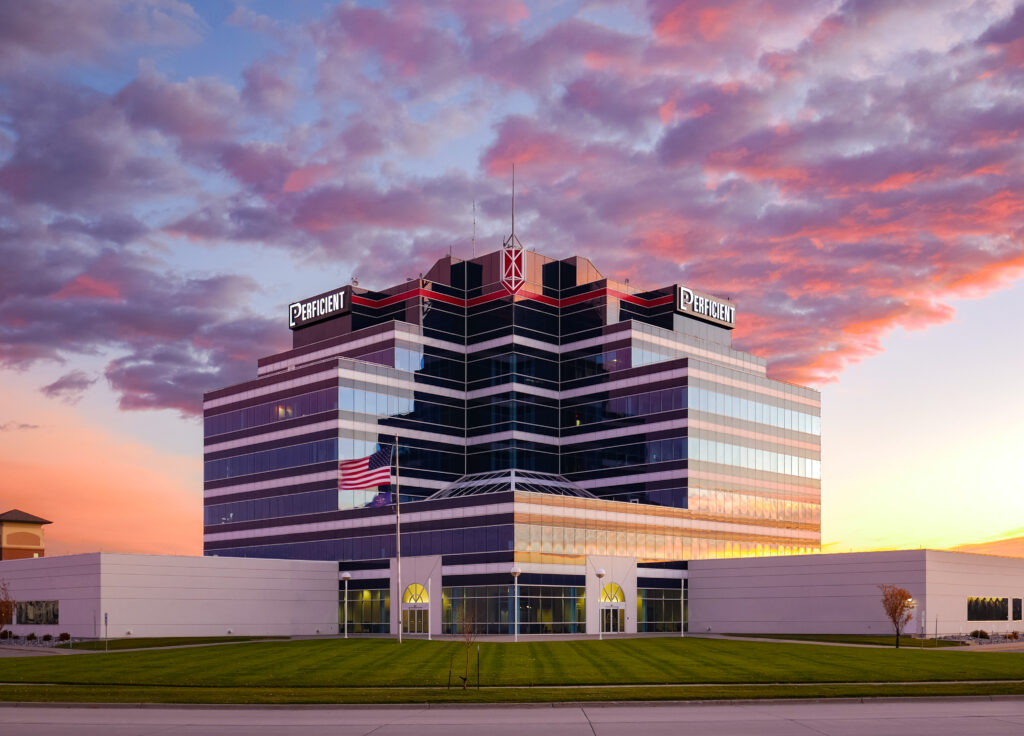
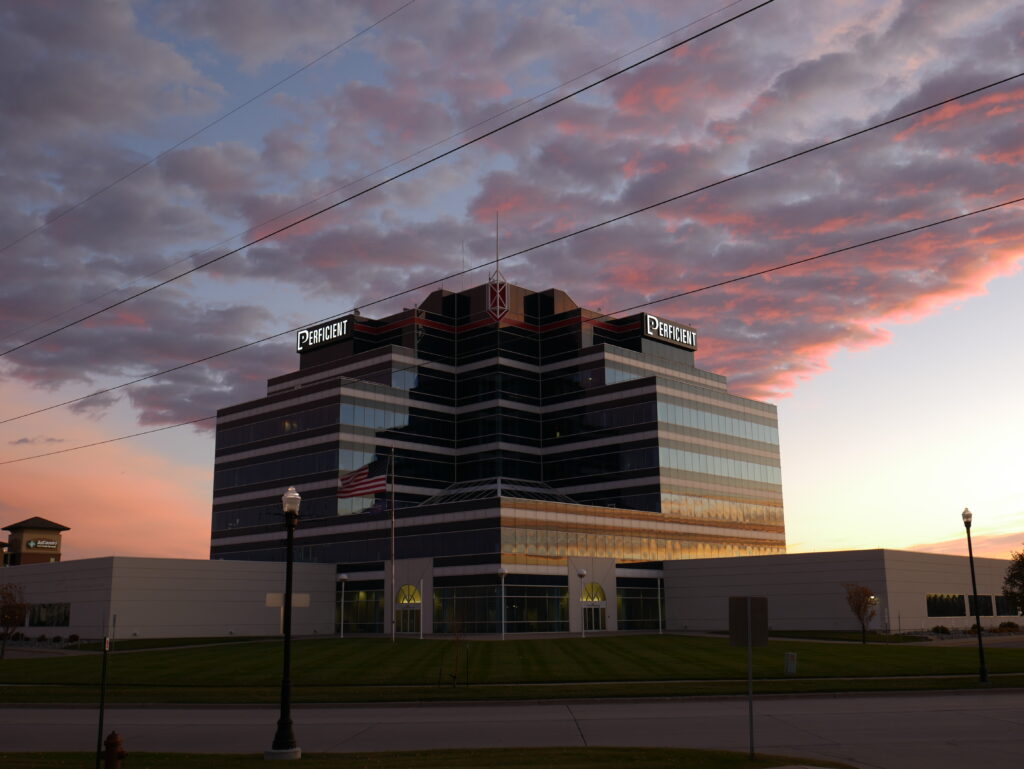
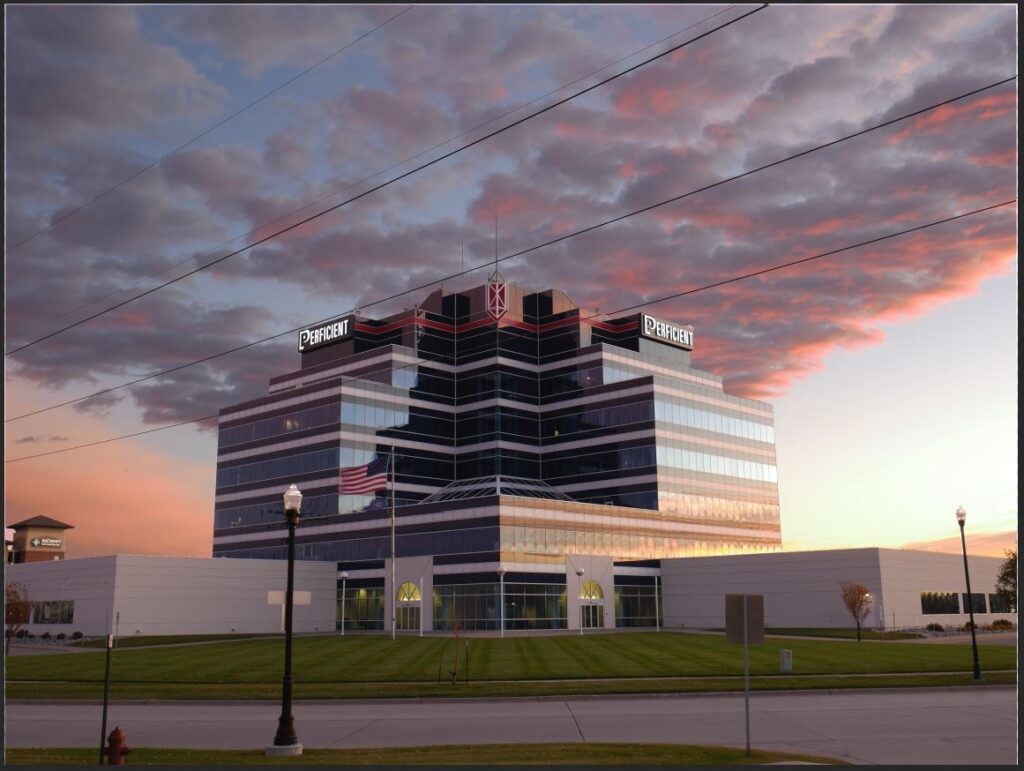
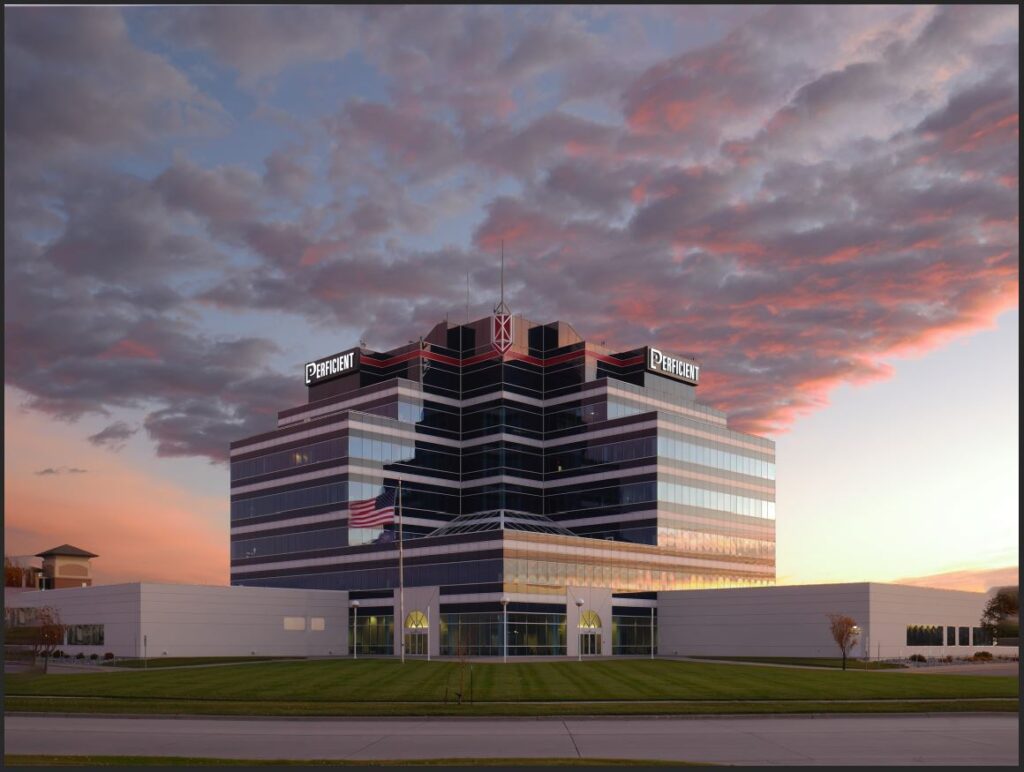
The images need to be aligned, so use a tripod if you can. Changing shutter speed is the best way to get the different exposures without changing other aspects of the image. The following images are what I used to create the final exposure blended image above.

So how is it actually done? Let’s get into Photoshop and see in 7 easy steps.
Step 1. Open the Images in Photoshop
Open your two (or more) exposures as layers in photoshop. I like to do this by importing the RAW files into Lightroom Classic (doesn’t work in new Lightroom) first and adding them to photoshop from there. Once imported, just select both images, right click, and select “Edit in > Open as Layers in Photoshop”. I prefer this because once the blending is done in Photoshop, the completed image automatically goes back to Lightroom when you save the Photoshop file. This makes my editing workflow faster because I always edit my images in Lightroom.
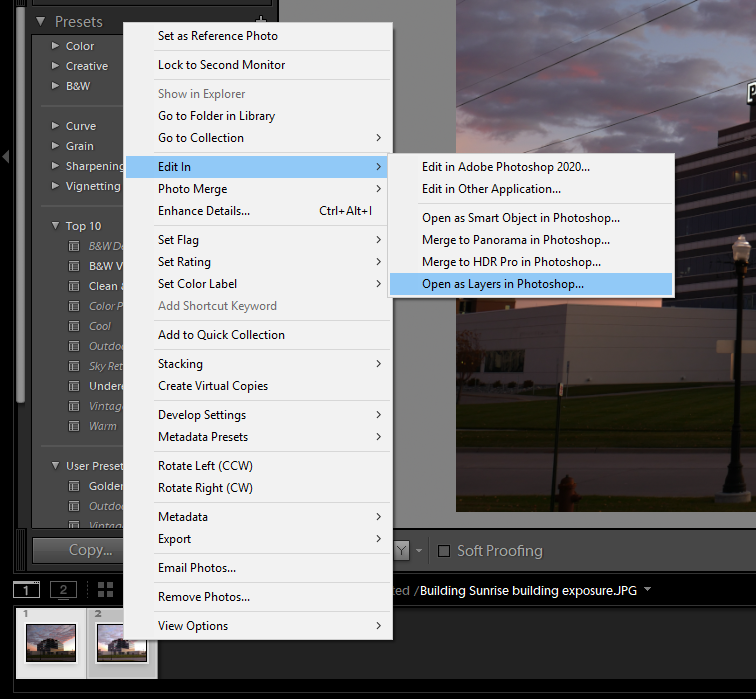
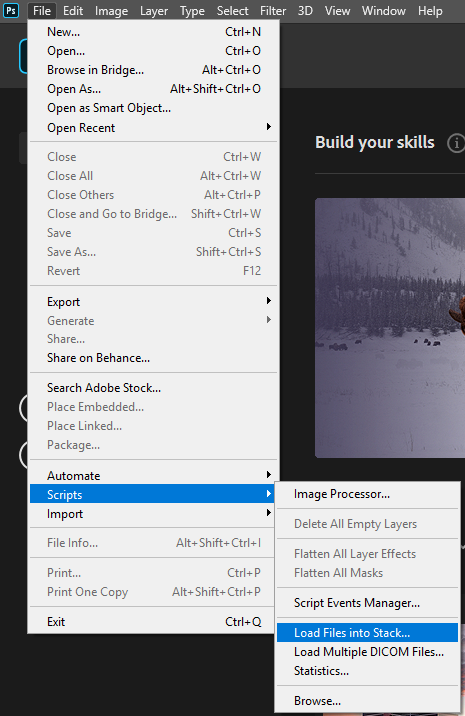
To open directly in Photoshop, select “File > Scripts > Load file into stack”.
Step 2. Make Sure Your Images Are Aligned
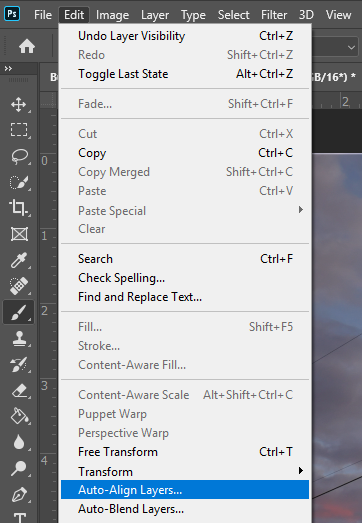
This step is crucial. If your images are not aligned exactly, the final image will be off. You may have bumped your tripod or moved the camera slightly by pressing the shutter button too hard when getting your exposures. Every pixel needs to be perfect. Luckily, there is a simple solution. In Photoshop, just select “Edit > Auto-Align Layers” and choose “Auto”. That easy.
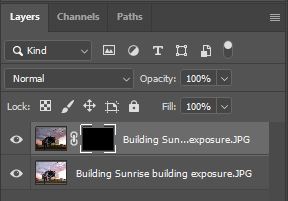
Step 3. Add a Layer Mask
This step is simple. Place the sky exposure on top, select that layer, and select “Layer > Layer Mask > Hide All”. A quicker way to do this is to press “alt+L > M > H” on your keyboard. This will mask out the entire sky layer and leave the building + foreground layer in view.
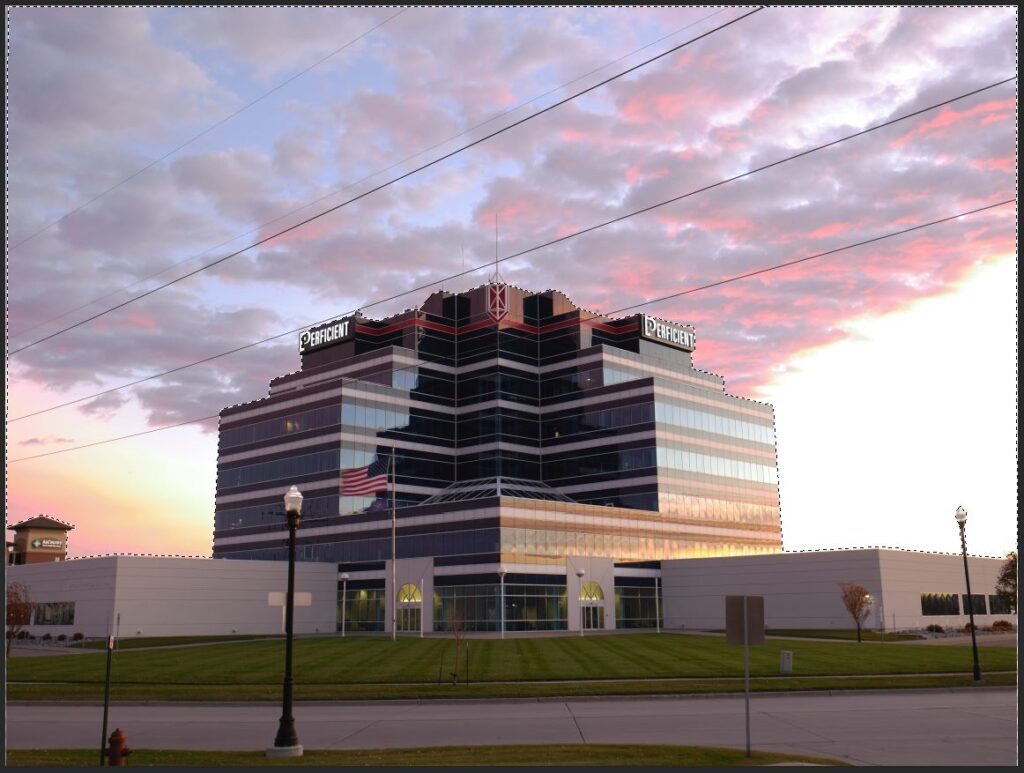
Step 4. Select the Sky Using the Quick Selection Tool
Time to get that sky back. Select the Quick Selection Tool from the left-hand toolbar (or just press “W”) and select the sky so that the marching ants (moving dotted line) roughly surround the sky. If too much becomes selected, remove the excess using the minus version of the quick selection tool.
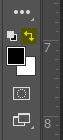
Step 5. Invert Colors and Delete Selected Mask Area
Now all that needs to be done is to invert the colors on the left-hand toolbar and press the delete key. This will remove the portion of the layer mask with the sky revealing the sky from the sky exposure and the building from the building exposure.
Then press “crtl+D” to deselect the selected area.
Step 6. Touch Up with The Brush Tool
The quick selection tool is great but won’t get you 100% of the way there. To finish blending, select the Brush tool from the left-hand toolbar (or press “B”) and fix the areas that the quick selection tool missed. You will need to invert colors again so that the white box is to the left of the black box. You can zoom in on the image by pressing “alt” and using the scroll wheel. This makes touching up much easier.
Step 7. Save and Edit the Photo
Start by selecting all layers, right clicking, and selecting “Flatten Image”. Make any edits you wish inside Photoshop (I used the “Spot Healing Brush Tool” to remove the power lines, some signs, light poles, and the fire hydrant. Then I fixed the areas the Spot Brush failed with the “Clone Stamp Tool”. Finally, I used the “Camera Raw Filter… > Transform Tool > Guided” to straighten my vertical lines.) and press “ctrl+S” to save the image.
If you started in Lightroom, the final Photoshop image will automatically go there for more editing. If you didn’t start in Lightroom, select “File > Export > Quick Export as png” to get the completed image.
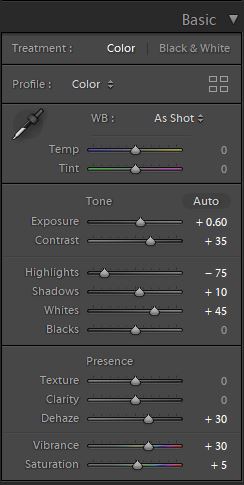
Have you ever taken a picture, looked at it, and thought, “That isn’t what it looks like. It looks so much better in person”. You are not alone. Those starting pictures I had did not reflect what I saw the morning I took them. Even after the exposure blending it still didn’t have the pop it had in real life. Here are the Lightroom settings I used to get the final image to reflect the splendor I saw that morning.
After those settings were applied, we finally get the image from the beginning of the article. It wouldn’t be possible without exposure blending.
Thanks for reading! I hope you found the article useful!