It’s common to get distortion when taking photos of buildings. Luckily, this is easy to fix in Photoshop. It only takes 4 simple steps.
What is Distortion?
In photography, distortion is when the perspective of an image is warped from reality. This can be caused by having a very wide-angle lens (small focal length) or by tilting your camera either up or down.
How to Prevent Distortion
The way to prevent distortion is simple in theory but not always simple in practice. Distortion is caused by having a low focal length lens or by tilting your camera. So, to stop distortion from happening, increase your focal length and/or keep your camera level.
Obviously, this is not always feasible. Sometimes tilting is necessary to get everything in your frame. Tilt-shift lenses were invented to fix this problem but are very expensive. And you can’t always increase your focal length. You may not want to even if you can. Luckily, there’s a way to fix distortion after you’ve already taken the picture.
The Best Way to Fix Distortion
Perspective can be fixed in both Lightroom and Photoshop. Lightroom Works in many situations but I find but it often fails to perfectly fix perspective. Only Photoshop has the capacity to fix perspective distortion in every situation. There’s also more than one way to fix perspective distortion in Photoshop. You can fix it through the Camera RAW Filter, the Perspective Warp tool, Perspective Transform, or the Perspective Distort tool. In my opinion, the way that gives you the most freedom and is best at fixing distortion is the Perspective Distort function. Let’s get started.
Step 1. Open the Images in Photoshop
You need to start by getting your images into Photoshop. My favorite way to do this is by importing RAW files into Lightroom Classic, then sending them to Photoshop from there. I prefer this method because you can easily send your image back to Lightroom for editing once you’re done in Photoshop.
Once your images are in Lightroom, simply right click on the thumbnail image at the bottom of the screen and select “Edit in > Open in Adobe Photoshop 2020”.

To open directly in Photoshop, select “File > Scripts > Load file into stack”.
Step 2. Add Guide Lines
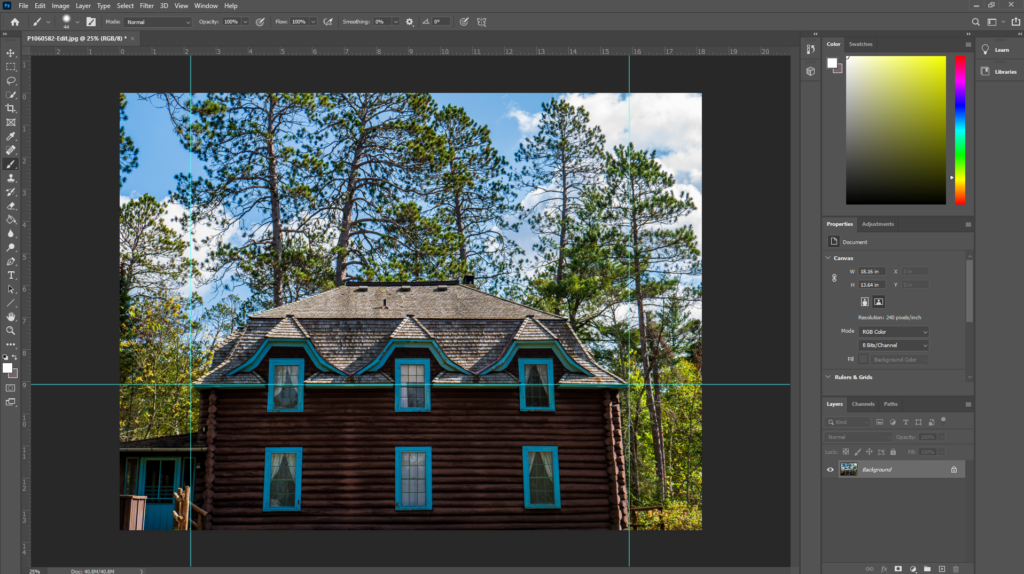
This method of fixing distortion involves freely distorting the image. To do this successfully, it’s necessary to add guide lines. To add guide lines simply click and drag on the horizontal ruler for horizontal lines and the vertical ruler for vertical lines. Drag these lines so they touch the corner of one of the lines in your photo that you intend to make vertical.
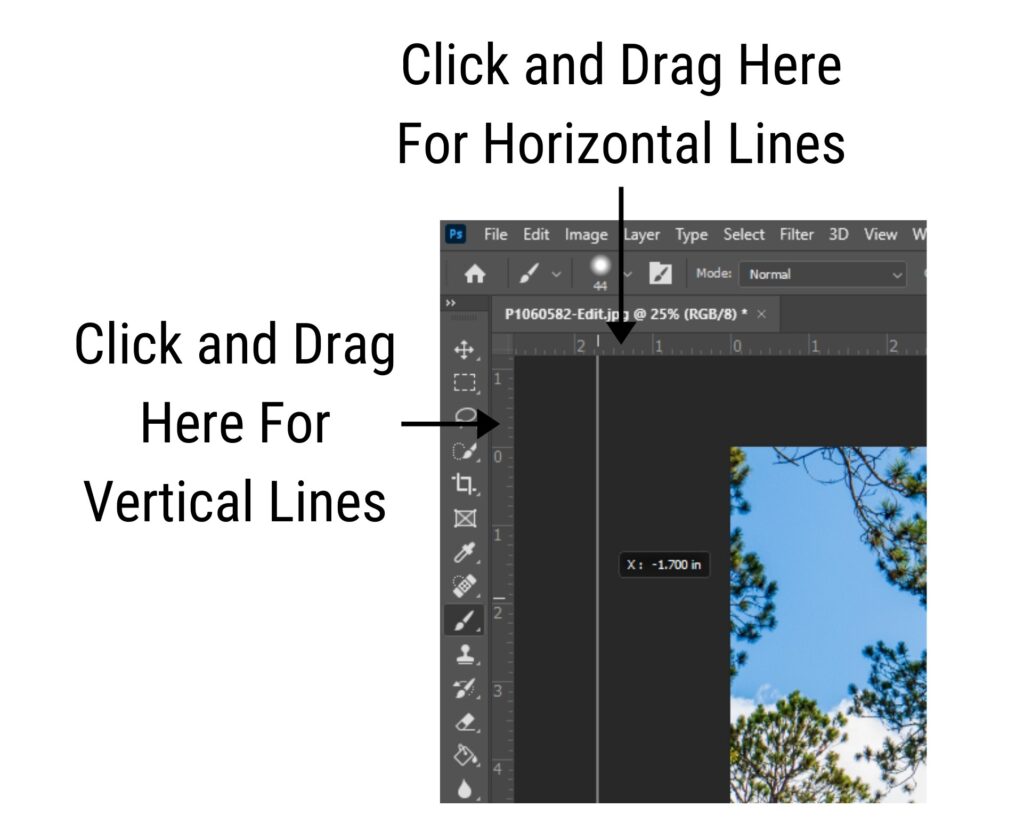
The following is an example of where you should put your guidelines.
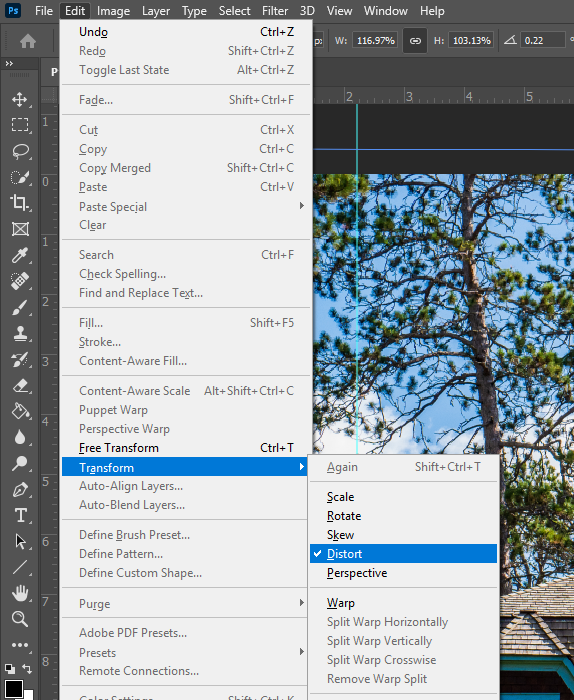
Step 3. Distort Your Image
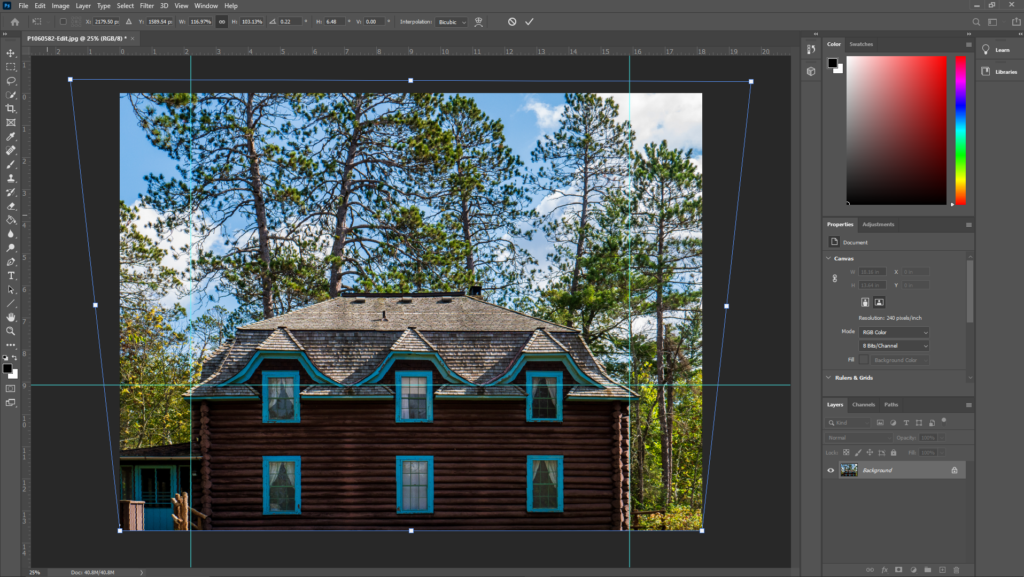
Once your guide lines are in place it’s time to distort the image. First, we need to select the image. To do this quickly, press Ctrl + A. Now that the images selected select “Edit > Transform > Distort”. Then drag on the corners of the distort overlay until the lines in your image match the guide lines you placed earlier.
Step 4. Save and Edit Your Image
All that’s left to do now is to save and edit your image. If you started in Lightroom all you need to do is press Ctrl + S and the adjusted image will automatically go into Lightroom for editing. If you don’t want to edit your image, all you need to do is press Ctrl + S to save a JPEG. Below is my final edited image.
Conclusion
It’s possible to prevent distortion in-camera, but not always feasible or desirable. Once you have a distorted image, there are many ways to fix it. The best way is by using the perspective distort function in Photoshop. Using this method is the easiest and most powerful way to fix distorted images.