Auto Exposure Bracketing (AEB) is easy on Canon Cameras. All it takes is a couple button presses and you can be sure you’ll get the right exposure and have all the images you need for perfect HDR.
If you prefer to watch, check out the video below. It has all the information from the article.
What is Exposure Bracketing?
In photography, exposure bracketing is a technique where three or more photos are taken in succession with different exposures. One will be overexposed, one correctly exposed, and the third underexposed. This is done to make sure the correct exposure is captured and/or to create HDR images.
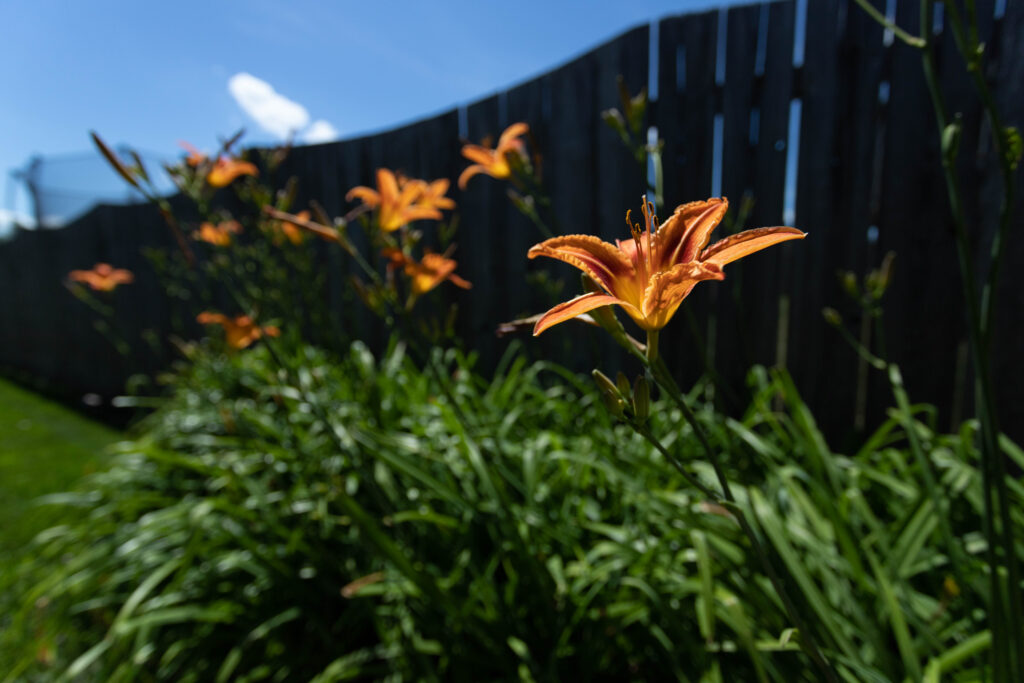
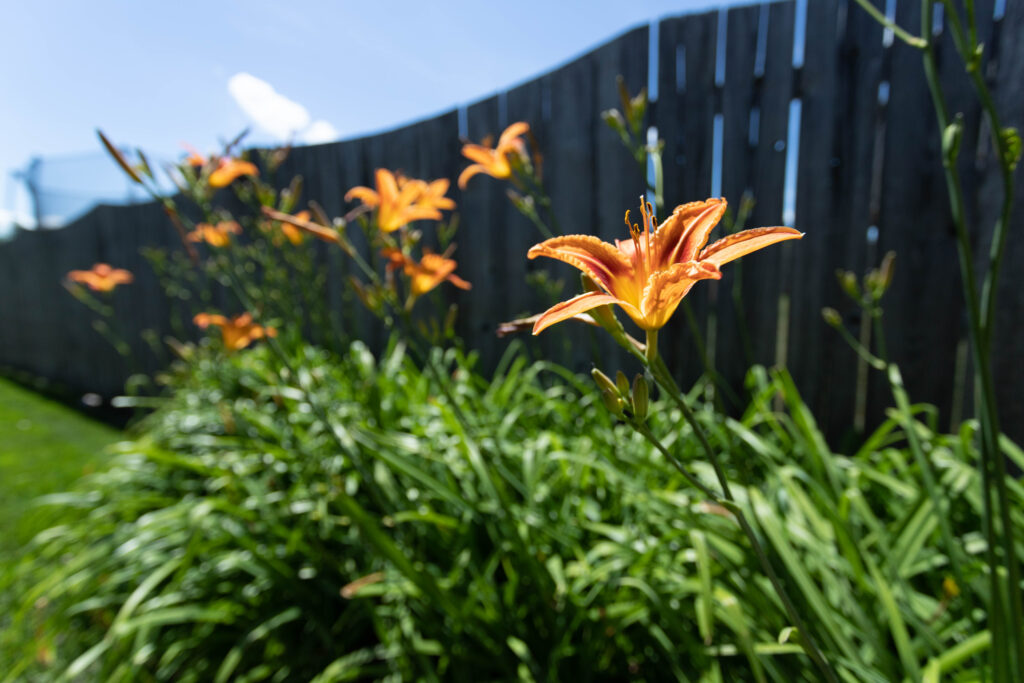
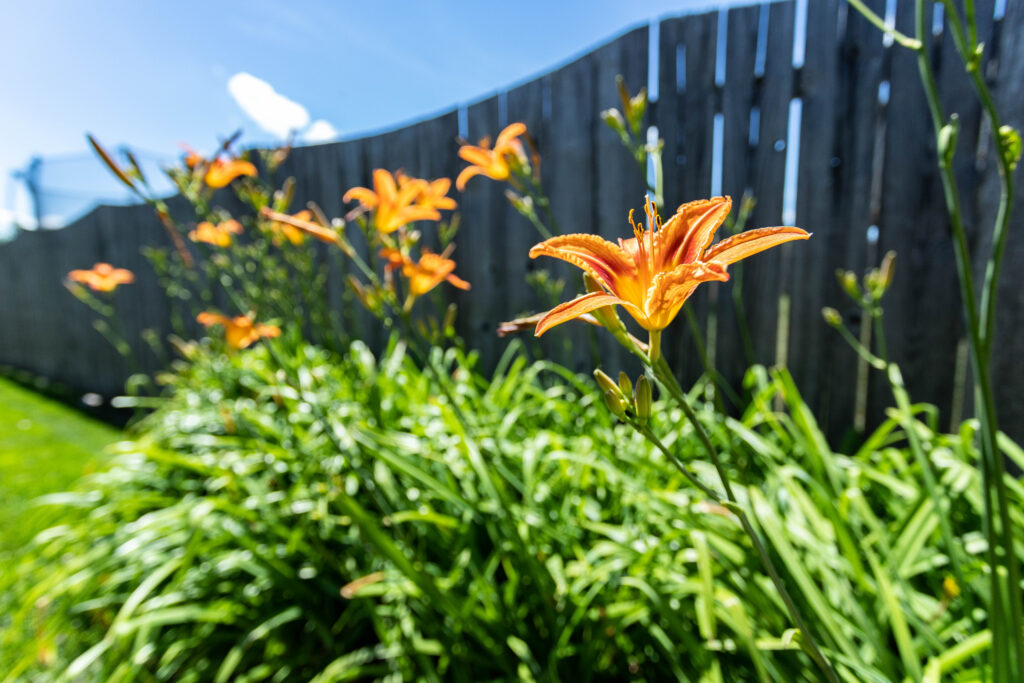
The above images were taken automatically using Canon’s Auto Exposure Bracketing (AEB) function.
In Canon Cameras, AEB can be used in Program Mode (P), Shutter Priority Mode (Tv), Aperture Priority Mode (Av), and Manual Exposure Mode (M). When using AEB in Tv mode, be careful not to set your base exposure at the extremes of your aperture, or you won’t get bracketed images.
How to Set Auto Exposure Bracketing (Canon)
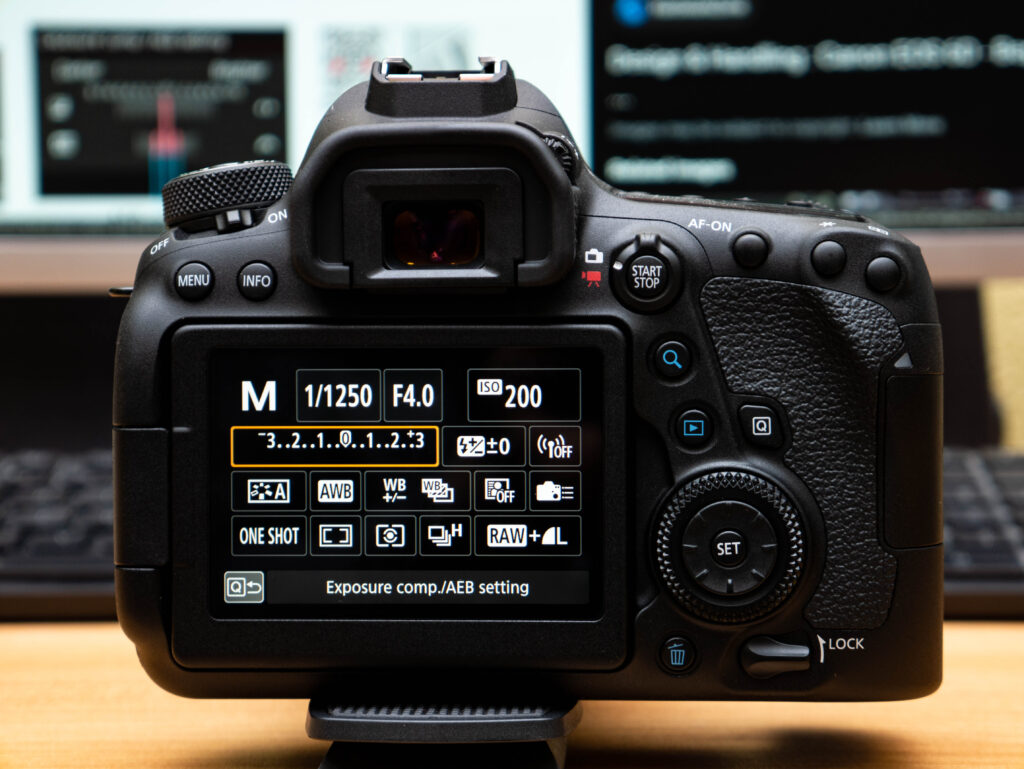
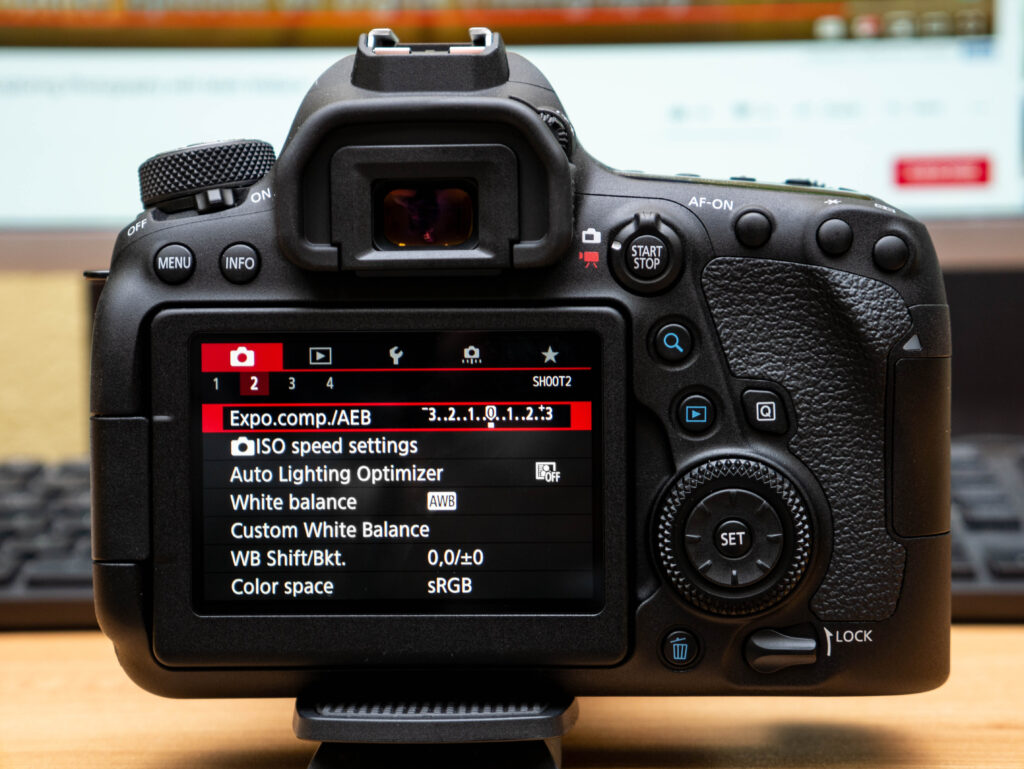
There are two ways to set AEB. The simplest way is by using the Q menu found by pressing the white Q button on the back of your camera. To activate AEB:
- Select the Q button on the back of your camera.
- Select the “Exposure comp./AEB setting” near the top left of the screen.
- Scroll the top scroll wheel to activate Auto Exposure Bracketing.
- Keep scrolling in 1/3 stop increments until you reach the desired level of bracketing.
To turn off Auto Exposure Bracketing, simply scroll the top wheel in the opposite direction until the three lines become one in the center.
The second way to set AEB is through the main menu.
- Select the menu button on the back of your camera.
- Select the “Exposure comp./AEB setting” under camera settings.
- Scroll the top scroll wheel to activate Auto Exposure Bracketing.
- Keep scrolling in 1/3 stop increments until you reach the desired level of bracketing.
Single-Frame Advance vs Continuous Advance
You can take AEB images on Canon cameras using either single-frame advance or continuous advance drive modes. Single-frame advance is the standard way to operate a camera and is most likely the mode your camera is in now. Every time you press the shutter button, you take a picture. For AEB, this means you must press the shutter button three times to get your bracketed images.
Continuous advance takes more than one picture for each press of the shutter button. When auto exposure bracketing is enabled, this means you simply press the shutter button once and all three bracketed images will be automatically taken.
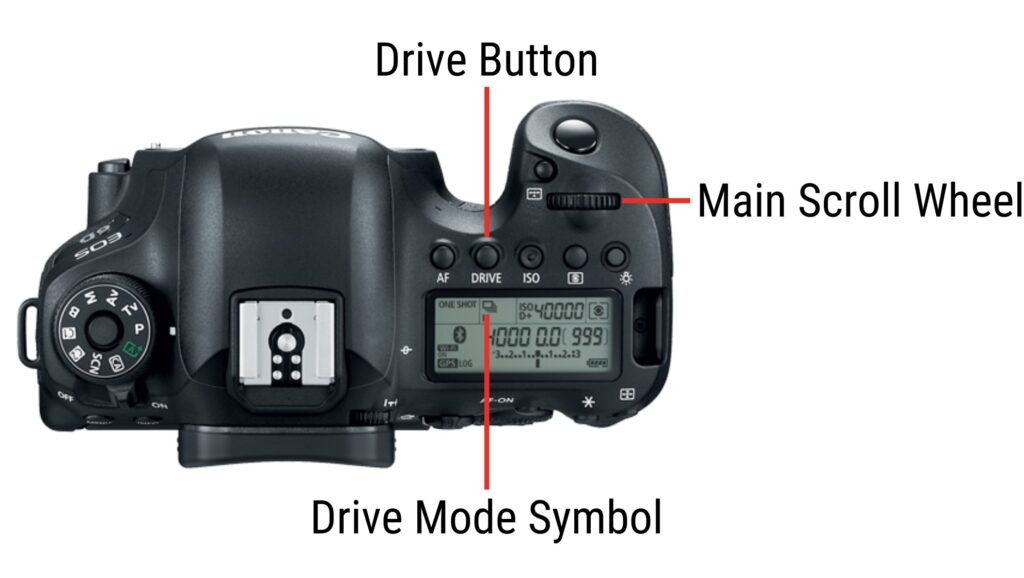
Changing between single-frame and continuous advance is simple.
- Select the Drive button.
- Turn the main scroll wheel to the desired drive mode.
Manual Exposure Bracketing
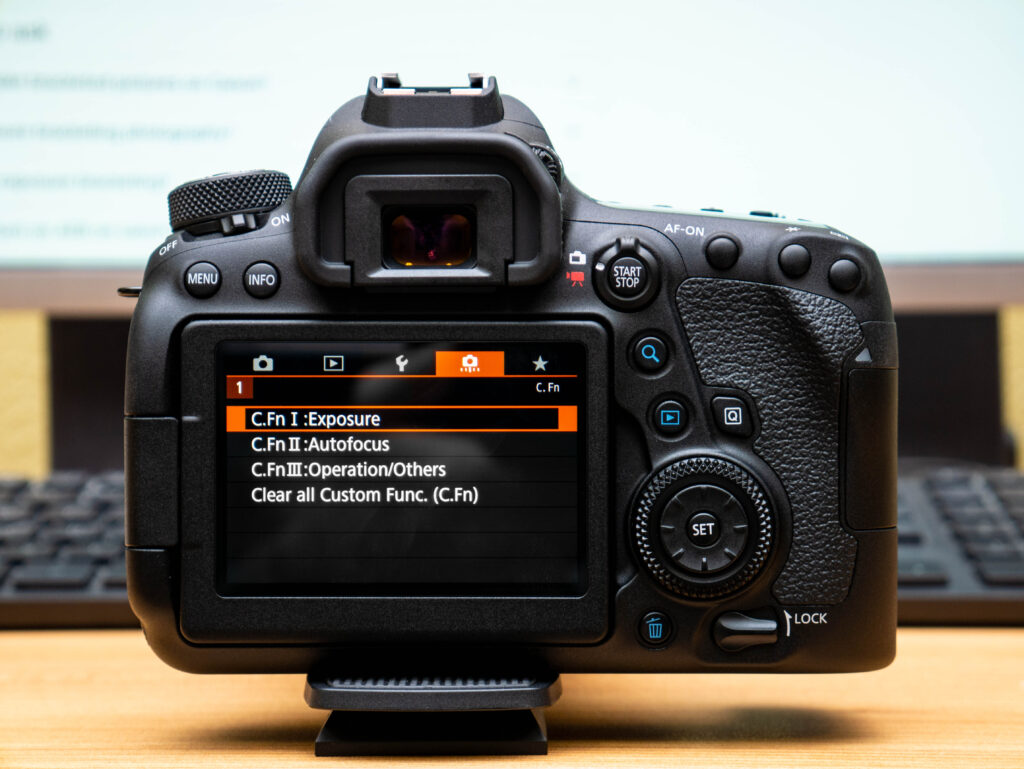
If you want more control over the AEB settings, you can change them manually in the custom function menu. It is a fairly simple process.
- Navigate to the Custom Function Menu
- Select C. Fn I: Exposure
- Choose desired AEB scroll incriments (either 1/2 or 1/3 stop)
- Move to the second page by pressing the right side of the back wheel
- Choose whether you wish to auto cancel AEB settings on camera shutdown.
- Move to the third page
- Choose the order your bracketed images are taken
- Move to the fourth page
- Choose the number of bracketed shots to take (2, 3, 5, or 7)
HDR vs Exposure Bracketing
The difference between HDR and exposure bracketing is simple. Exposure bracketing is taking photos of a scene at different exposures. HDR is the combination of exposure bracketed photos into a single high dynamic range image. In other words, exposure bracketed photos are used to create HDR photos.
Canon In-Camera HDR
Canon allows you to take HDR images in-camera. You can take auto-HDR images in the M, Av, Tv, P, and SCN modes. To take HDR images in SCN mode:
- Turn the mode dial to SCN.
- Press the Q menu button on the back of your camera.
- Select choose scene.
- Navigate to “HDR Backlight Control” and select it.
When HDR Backlight Control scene mode is selected in SCN mode, your camera will automatically choose your settings and take three bracketed shots when you press the shutter button. It will then combine the images in-camera to create a single HDR image. Only the HDR image is saved. This mode is simple to use but gives minimal control. It tends to use ISO for bracketing, which can result in grainy images. I recommend using one of the other modes.
To take HDR images in M, Av, Tv, or P mode:
- Turn the mode dial to the desired shooting mode.
- Press the menu button.
- Under the camera settings, navigate to and select “HDR Mode”.
- Select “Adust dyn range” and choose your desired level of bracketing.
- Take an automatically created HDR image.
Using this method will take a set of three bracketed images and automatically combine them into a completed HDR image. To change how HDR mode works in these shooting modes, look to the other three settings under HDR Mode.
- Effect: Changes the look of the final image using color profiles.
- Continuous HDR: You can set it to take a single HDR shot and return to normal shooting or to take an HDR shot every time.
- Auto Image Align: Makes sure combining the images is aligned.
HDR in Lightroom
I prefer HDR images created in Adobe Lightroom because you retain the original bracketed images. It’s nice to have the original images in case you find out you like one of the exposures as-is or want to perform manual exposure blending. I also find Lightroom does a better job of processing the HDR image.
My Article: How to Create HDR Images in Adobe Lightroom
Conclusion
AEB is an easy to use tool in Canon cameras that is helpful for always getting the correct exposure or creating the perfect HDR image. I hope you enjoyed the article. Thanks for reading!